

Releases
Backend Services
Before starting a release, please open a Back-End Release issue and append it to the Development Board with the appropriate Sprint/Iteration. Update the release issue as you make progress through the release.
Step 1: GitHub Release
- The first step is to tag the branch (
main) from which the image will be built. - The tag can be created as part of the GitHub Release UI
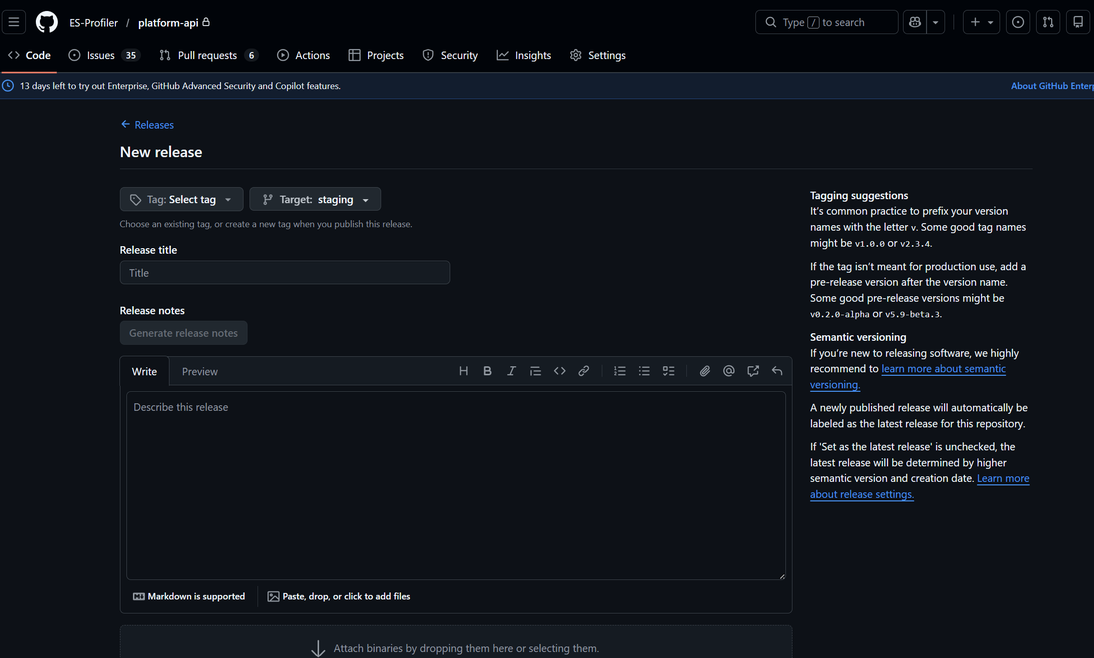
- When you create a tag in the format
v*(for example,v7.1.2), a GitHub workflow will trigger to build and push an image to AWS ECR. - Select the branch that the tag will be attached to and add a release title
- Please always click on the
Generate release notesbuttons to have GitHub create the release notes based on the commit messages added between the last release and this one - Then click
Publish releaseto start the workflow that will build out the image and push it to AWS ECR
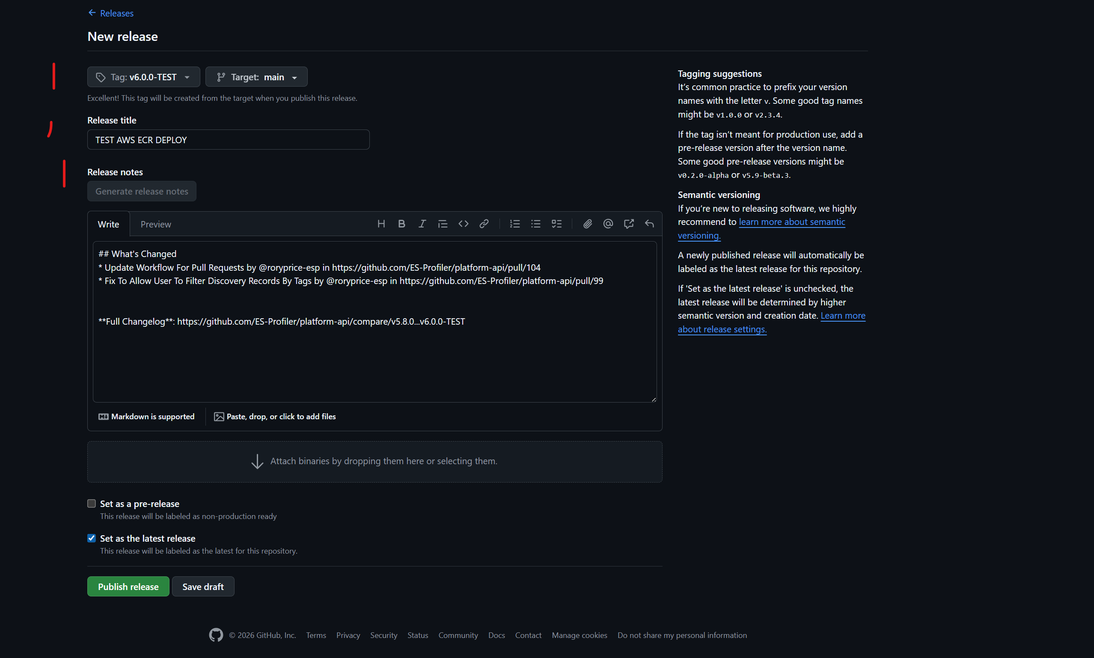
Step 2: Run Release Workflow
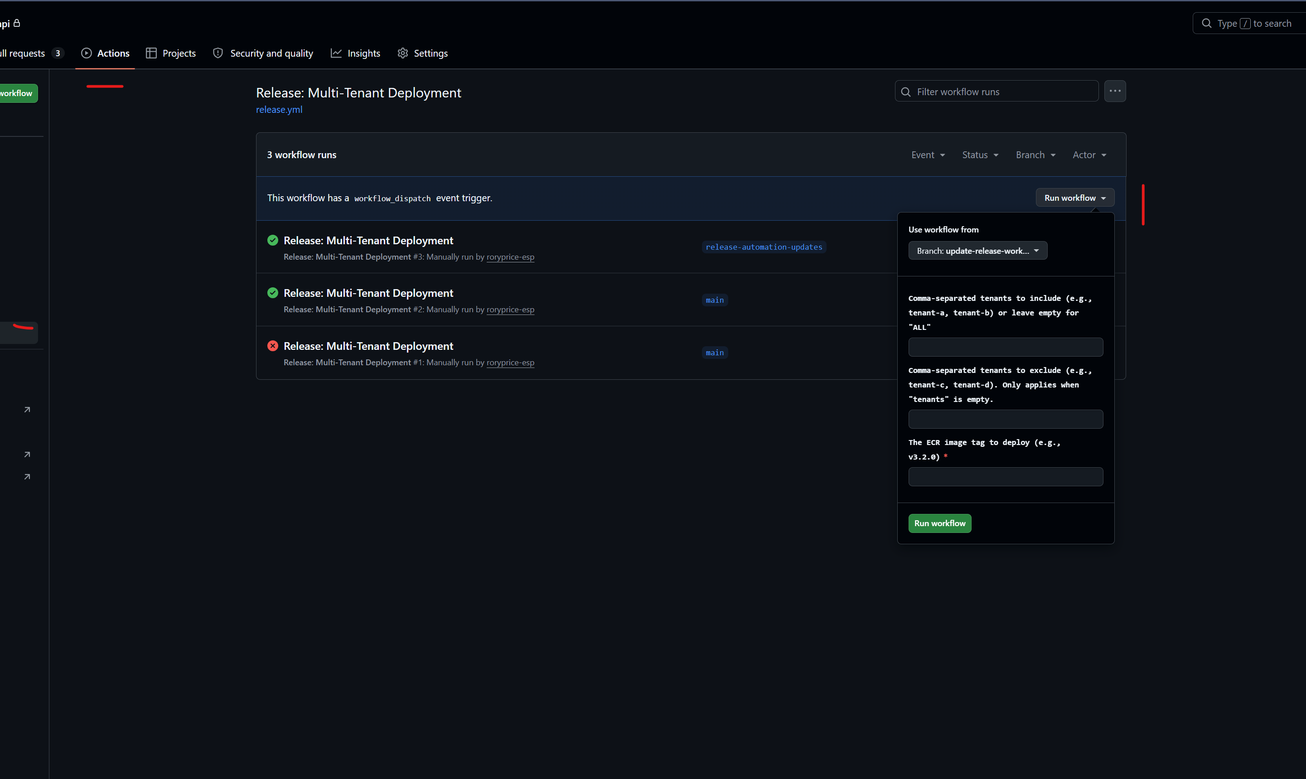
- Next, from the Action tab, select the
Release: Multi-Tenant Deployment - Click on the run workflow button, there will be three inputs to fill out, the only required one is the version tag that you created in the previous step (eg. v7.1.2). The other two inputs lets you run the release for specific tenants or to exclude specific tenants. If they are left blank, the release will run for all tenants. Also important to not that you can not use both the exclude and include inputs at the same time. The include input will always take precedence over the exclude input. Inputs are the service names on AWS of the tenants that you would like to include or exclude from the release.
- Click on
Run workflow. You can view the progress of the releases from the ECS on AWS
Frontend Applications
This section will cover the process of releasing a new version of a frontend application.
- Platform APP - *.own.esprofiler.com
- Vendor Portal - vendor.capability.exchange
- Account Portal - my.esprofiler.com
Before starting a release, please open a Front-End Release issue and append it to the Development Board with the appropriate Sprint/Iteration. Update the release issue as you make progress through the release.
Step 1: Production Build
- Ensure all code intended for production release is merged into the
mainbranch. - Navigate to the repository, and while on the
codetab, clicktagsfound to the right of the branch selector. - Click the releases button, then click
Draft a new releasebutton. - Click on
Select tagdropdown and at the bottom of the list, clickCreate new tag, in the prompt enter the version number,vX.X.Xand clickcreate. - For the
Tagetfield, themainbranch should be selected by default. - Enter a release title
Release vX.X.X - (Optional) Under
Release Notesselect the previously released version tag that comes immediately before this new tag if you don't trust the defaultAutooption (I don't). - Click
Generate Release Notes-- this will populate the Release Notes field with the commit messages since the last release. - Scroll down to the bottom of the page and click
Publish Release, this will trigger the Publish Tag workflow where it should be visibily running inActions. - Once the workflow completes, this will have created a new tag and pushed the build application to AWS Bucket in a folder reflecting the version number.
- Inform the backend team that the new version is ready for Production Tenant Rollout.
Step 2: Tenant Rollout
Currently the backend configures the frontend that the user will see for a given tenant
In order to update the version of the frontend the tenant is using we have to update the SPA property in the SPAProperties class in the platform-api repo.
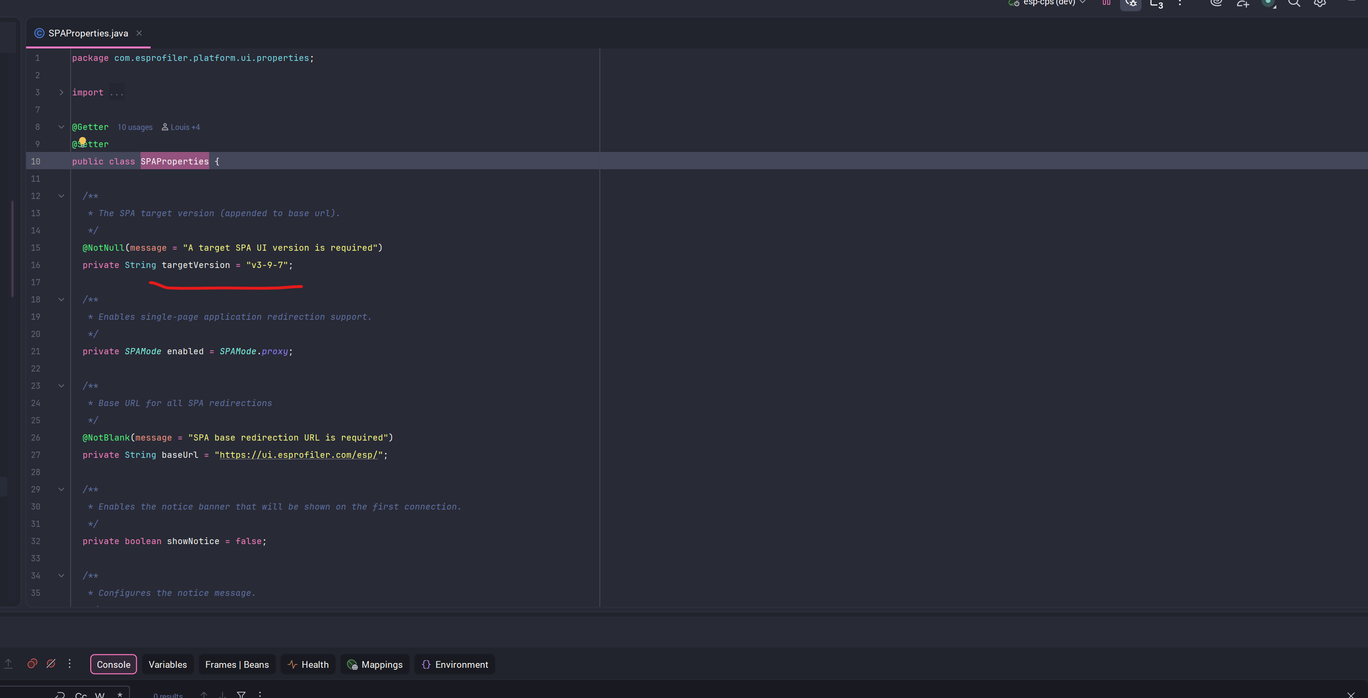
In this case the frontend version is 3.9.7 to update it to, for example 3.10.0 we would replace the targetString value from v3-9-7 to v3-10-0
The backend release process then has to be followed for the change to take effect. Please see Backend Release.
Staging: Release Candidate
Upon merge of a pull request to main, a release candidate will be automatically built and deployed to staging.own.esprofiler.com.
Staging: Review Apps (TBC)
- When to use
- How to use
Frontend Websites
TBC